这篇文章主要为大家详细介绍了Android调用手机摄像头的方法,文中示例代码介绍的非常详细,具有一定的参考价值,感兴趣的小伙伴们可以参考一下
本文实例为大家分享了Android调用手机摄像头的具体代码,供大家参考,具体内容如下
根据<第一行代码>进行改写:
布局文件,只有一个按钮,和一个Imageview,imageview用于显示拍下后的图片
activity_main.xml
<?xml version="1.0" encoding="utf-8"?>
<androidx.constraintlayout.widget.ConstraintLayout xmlns:android="http://schemas.android.com/apk/res/android"
    xmlns:app="http://schemas.android.com/apk/res-auto"
    xmlns:tools="http://schemas.android.com/tools"
    android:layout_width="match_parent"
    android:layout_height="match_parent"
    tools:context=".MainActivity">

    <LinearLayout
        android:layout_width="match_parent"
        android:layout_height="match_parent"
        android:orientation="vertical">


        <Button
            android:layout_width="match_parent"
            android:layout_height="wrap_content"
            android:id="@+id/take_photo"
            android:text="Take Photo"/>

        <ImageView
            android:layout_width="wrap_content"
            android:layout_height="wrap_content"
            android:layout_gravity="center_horizontal"
            android:id="@+id/picture"/>

    </LinearLayout>

</androidx.constraintlayout.widget.ConstraintLayout>
MainActivity.java
package com.example.choosepictest;

import androidx.appcompat.app.AppCompatActivity;
import androidx.core.content.ContextCompat;
import androidx.core.content.FileProvider;

import android.Manifest;
import android.app.Activity;
import android.content.ContentValues;
import android.content.Intent;
import android.content.pm.PackageManager;
import android.graphics.Bitmap;
import android.graphics.BitmapFactory;
import android.graphics.Camera;
import android.graphics.Matrix;
import android.media.ExifInterface;
import android.net.Uri;
import android.os.Build;
import android.os.Bundle;
import android.os.Environment;
import android.provider.MediaStore;
import android.view.View;
import android.view.WindowManager;
import android.widget.Button;
import android.widget.ImageView;
import android.widget.Toast;

import java.io.File;
import java.io.FileNotFoundException;
import java.io.IOException;
import java.text.SimpleDateFormat;
import java.util.Date;

public class MainActivity extends AppCompatActivity {

    public static final int TAKE_PHOTO=1;

    private Button takePhoto;
    private ImageView picture;
    private Uri imageUri;

    public static File tempFile;


    @Override
    protected void onCreate(Bundle savedInstanceState) {
        super.onCreate(savedInstanceState);
        setContentView(R.layout.activity_main);

        takePhoto = (Button) findViewById(R.id.take_photo);
        picture = (ImageView) findViewById(R.id.picture);
        takePhoto.setOnClickListener(new View.OnClickListener() {
            @Override
            public void onClick(View view) {
                tempFile=new File(getExternalCacheDir(),"output_image.jpg");
                if(tempFile.exists())
                {
                    tempFile.delete();
                }
                try {
                    tempFile.createNewFile();
                } catch (IOException e) {
                    e.printStackTrace();
                }
                if(Build.VERSION.SDK_INT>=Build.VERSION_CODES.N)
                {
                    imageUri= FileProvider.getUriForFile(MainActivity.this,
                            "com.example.choosepictest.fileprovider",tempFile);
                }else{
                    Uri.fromFile(tempFile);
                }
                Intent intent=new Intent("android.media.action.IMAGE_CAPTURE");
                intent.putExtra(MediaStore.EXTRA_OUTPUT,imageUri);
                startActivityForResult(intent,TAKE_PHOTO);
            }
        });
    }

    protected void onActivityResult(int requestCode,int resultCode,Intent data)
    {
        super.onActivityResult(requestCode,requestCode,data);
        switch (requestCode)
        {
            case TAKE_PHOTO:
            if(resultCode==Activity.RESULT_OK)
            {
                Bitmap bitmap= null;
                try {
                    bitmap = BitmapFactory.decodeStream(getContentResolver()
                    .openInputStream(imageUri));
                } catch (FileNotFoundException e) {
                    e.printStackTrace();
                }
                picture.setImageBitmap(rotateIfRequired(bitmap));
            }
            break;
            default:
                break;
        }

    }

    private Bitmap rotateIfRequired(Bitmap bitmap)
    {
        String path=tempFile.getPath();
        ExifInterface exif = null;
        try {
            exif=new ExifInterface(path);
        } catch (IOException e) {
            e.printStackTrace();
        }
        int orientation= exif.getAttributeInt(ExifInterface.TAG_EXIF_VERSION,
                ExifInterface.ORIENTATION_NORMAL);
        switch (orientation)
        {
            case ExifInterface.ORIENTATION_ROTATE_90:
                bitmap=rotateBitmap(bitmap,90);
                break;
            case ExifInterface.ORIENTATION_ROTATE_180:
                bitmap=rotateBitmap(bitmap,180);
                break;
            case ExifInterface.ORIENTATION_ROTATE_270:
                bitmap=rotateBitmap(bitmap,270);
                break;
            default:
                break;
        }
        return bitmap;

    }

    private Bitmap rotateBitmap(Bitmap bitmap,int degree)
    {
        Matrix matrix=new Matrix();
        matrix.postRotate((float)degree);
        Bitmap rotateBitmap=Bitmap.createBitmap(bitmap,0,0,
                bitmap.getWidth(),bitmap.getHeight(),matrix,true);
        bitmap.recycle();
        return bitmap;


    }

}
活动管理(mainfest):
<?xml version="1.0" encoding="utf-8"?>
<manifest xmlns:android="http://schemas.android.com/apk/res/android"
    package="com.example.choosepictest">
    <application
        android:allowBackup="true"
        android:icon="@mipmap/ic_launcher"
        android:label="@string/app_name"
        android:roundIcon="@mipmap/ic_launcher_round"
        android:supportsRtl="true"
        android:theme="@style/Theme.ChoosePicTest">
        <activity
            android:name=".MainActivity"
            android:exported="true">
            <intent-filter>
                <action android:name="android.intent.action.MAIN" />

                <category android:name="android.intent.category.LAUNCHER" />
            </intent-filter>
        </activity>

        <provider
            android:authorities="com.example.choosepictest.fileprovider"
            android:name="androidx.core.content.FileProvider"
            android:exported="false"
            android:grantUriPermissions="true">

            <meta-data
                android:name="android.support.FILE_PROVIDER_PATHS"
                android:resource="@xml/file_paths"/>

        </provider>

    </application>

</manifest>
用于指定路径file_paths.xml:
<?xml version="1.0" encoding="utf-8" ?>
<paths xmlns:android="http://schemas.android.com/apk/res/android">
<external-path
name="my_images"
path="/"/>
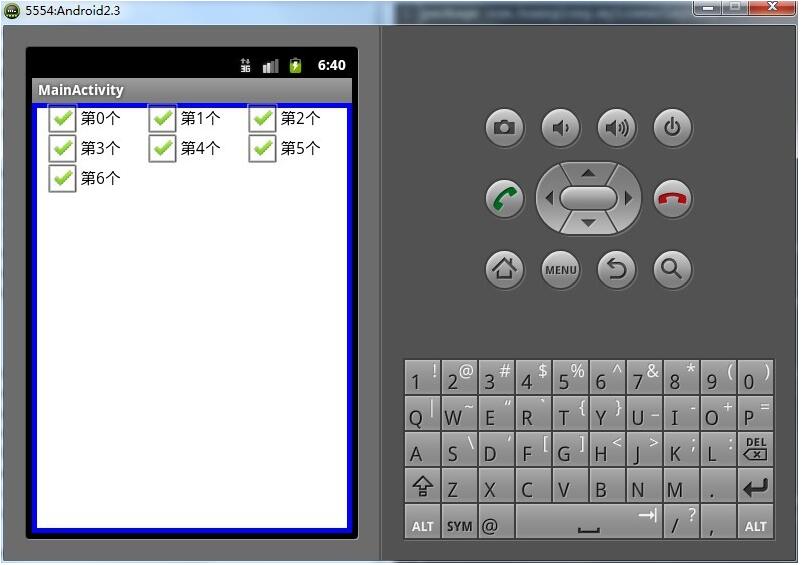
</paths>效果图:

这是虚拟机,所以啥也看不到,真机就可以看到了。
以上就是本文的全部内容,希望对大家的学习有所帮助,也希望大家多多支持编程学习网。
织梦狗教程
本文标题为:Android调用手机摄像头的方法


基础教程推荐


猜你喜欢
- IOS应用内跳转系统设置相关界面的方法 2022-11-20
- IOS 播放系统提示音使用总结(AudioToolbox) 2023-03-01
- 解决Android Studio突然不显示logcat日志的问题 2023-02-04
- Flutter手势密码的实现示例(附demo) 2023-04-11
- Android中的webview监听每次URL变化实例 2023-01-23
- Android开发使用RecyclerView添加点击事件实例详解 2023-06-15
- android studio按钮监听的5种方法实例详解 2023-01-12
- Flutter绘图组件之CustomPaint使用详解 2023-05-12
- Android多返回栈技术 2023-04-15
- iOS开发教程之XLForm的基本使用方法 2023-05-01